Google+
Showing posts with label Angular2-6. Show all posts

Tuesday, April 7, 2020

Solved : Preflight Request CORS error : "The requested resource does not support http method 'OPTIONS'"

In this article we review how to solve the Preflight CORS error "The requested resource does not support http method 'OPTIONS'".
Are you confronted to this error ? :


For several CORS requests, the browser sends a previous request, named "preflight request", before it sends the actual request for the resource.
It is not enought to use the standard CORS (Cross Origin Resource Sharing) on web.config , in order to solve the problem.
Here you can see the web.config settings, usually arranged to solve the problem :


How to solve the Preflight CORS error "The requested resource does not support http method 'OPTIONS'" using Angular7


The issue appears while crossing domains, and relates to POST, PUT, PATCH, and DELETE methods:
here you can see several requests , also from the Angular 7 app, as from POSTMAN :


As said, it is not enought to set the web.config to CORS.
Now,  usually the browser sends a previous request to the request that you are sending, named "preflight request", before it sends the actual request for the resource. This Preflight request is of OPTIONS type.
If the response headers do not allow the required HTTP METHOD, the browser do not send it.

The problem is, the WebApi app has not an action to process the Preflight OPTIONS request :


That is what the error is trying to say us.

So, just write an action for OPTIONS verb, that only responds an "OK", as this :


Now try again. Send a request. The breakpoint will show the OPTIONS request being processed :


Immediately after, the intended request is taken care of:
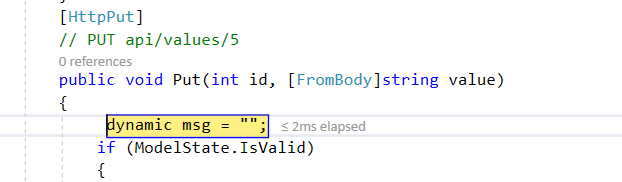


That solves this issue.
Have a good day :-)

Enjoy Angular.....

      by Carmel Schvartzman

כתב: כרמל שוורצמן

Wednesday, January 29, 2020

How to implement ngDoCheck from the Angular LifeCycle Hooks using Angular 7

In this article we review how to implement ngDoCheck from the Angular LifeCycle Hooks using Angular 7.
 The ngDoCheck will be triggered ONLY when changes to some @Input() Property of the Child component are NOT DETECTED by the ngOnChanges method. This is the case of "impure" changes made to the Child by the Parent component.
For example, if the child's property changed was an object, and the parent did not change the reference to that object, but some inner property, this is considered impure change, and therefore ngOnChanges will not detect it.
That's why we use ngDoCheck :


You can download the entire Angular code from the following URL:
https://github.com/CarmelSchvartzman/ANGULAR/blob/master/LIFECYCLE_HOOKS/ngDOCHECK_ngONCHANGES_LifeCycle_Hook

How to implement ngDoCheck from the Angular LifeCycle Hooks  using Angular7


To create both components using the CLI :

/////////  ng g c lifecycle/child --flat -s -t -m app.module -d
/////////  ng g c lifecycle/parent --flat -t -s -m app.module -d


This is the code for the child :

/////////////////  CHILD :

import { Component, OnInit, Input, DoCheck, OnChanges, SimpleChanges } from '@angular/core';
import { Friend } from '../models/friends';
import { ComponentFactoryResolver } from '@angular/core/src/render3';

@Component({
  selector: 'app-child',
  template: `
    <p class='centered'>
      Data : {{data.name}}
    </p>
  `,
  styles: [`.centered{display:flex;justify-content:center;}`]
})
export class ChildComponent implements  OnChanges, DoCheck {
  @Input() data;


  ngOnChanges(changes: SimpleChanges) {
    // tslint:disable-next-line:forin
    for (const propName in changes) {
      const change = changes[propName];
      const curVal = (change.currentValue);
      const prevVal = (change.previousValue);
      if (prevVal != null) {
        console.warn(`ngOnChanges - PREVIOUS : ${prevVal.name} - CURRENT : ${curVal.name}`);
      }
    }
  }

  ngDoCheck() {
    console.warn(`ngDoCheck data : ${this.data.name} .`);
  }

}


and this is the code for the parent :


import { Component, OnInit } from '@angular/core';
import { Friend } from '../models/friends';

@Component({
  selector: 'app-parent',
  template: `
   <app-child id='child'  [data]='parentData'  ></app-child><br><br><br>
   <div class='centered'>
   <button class='btn btn-info ' (click)='ChangeData()'>Change Data</button>
   </div>
  `,
  styles: [` .centered{display:flex; justify-content:center;}`]
})
export class ParentComponent implements OnInit {
  parentData: Friend;


  ngOnInit() {
    this.parentData = new Friend();
    this.parentData.name = 'Original Name';
  }

  ChangeData(): void {

    // This change (IMPURE CHANGE) will trigger ONLY ngDoCheck : (because the reference was NOT changed)
     this.parentData.name = 'Changed name';

     // The following changes (PURE + IMPURE CHANGE) will trigger BOTH ngOnChange + ngDoCheck : (because the reference WAS changed)
    // this.parentData = new Friend();
   // this.parentData.name = 'NEW FRIEND NAME';
  }

}


That's All!!! 
Enjoy Angular.....

      by Carmel Schvartzman

כתב: כרמל שוורצמן


Friday, January 24, 2020

How to create a Custom Validator for a Select control using Angular 7

In this article we review how to create a Custom Validator using Angular 7,  in an Angular Application that includes a Template Driven Form , custom validator that allows to ignore a default "Select a city" value  , looking like this :


You can copy-paste all pieces of source code from this Tutorial, or elsewhere you can download the entire Angular code from the following URL:
https://github.com/CarmelSchvartzman/ANGULAR/blob/master/CUSTOM_VALIDATORS/SELECT_VALIDATOR


How to create a Custom Validator  for a Select control using Angular7


//////////////////////  CUSTOM VALIDATOR :


import { Directive } from '@angular/core';
import { Validator, AbstractControl, ValidationErrors, NG_VALIDATORS } from '@angular/forms';

@Directive({
  selector: '[appRequiredValidator]',
  providers: [{ provide: NG_VALIDATORS, useExisting: RequiredValidatorDirective, multi: true }]
})
export class RequiredValidatorDirective implements Validator {
  validate(control: AbstractControl): ValidationErrors {
    return control.value === '-1' ? { noValueChosen: true } : null;

  }
}


//////////////////// HTML VIEW :


      <div class="form-group" [class.has-error]='city.errors?.noValueChosen'  [class.has-success]='city.valid'>
        <label class='control-label' for="city">
          City
        </label>
        <select #city='ngModel'   appRequiredValidator   class="form-control" name="city" id="city" [(ngModel)]='friend.city'>
          <option  style='color:rgb(201, 149, 149)' value='-1'>Select a City</option>
          <option *ngFor='let c of cities' [value]="c.id">{{c.name}}</option>
        </select>
        <span class='help-block' *ngIf='city.errors?.noValueChosen'>Please select a city</span>
      </div>


/////////////////////  COMPONENT :

 cities: City[] =
    [{ id: 1, name: 'Athens' }, { id: 2, name: 'Volos' }, { id: 3, name: 'Thesaloniki' },
    { id: 4, name: 'Santorini' }, { id: 5, name: 'Corfu' }];


/////////////////////  MODULE :

import { RequiredValidatorDirective } from './shared/required-validator.directive';

@NgModule({
  declarations: [
    RequiredValidatorDirective
  ],
............

The results :


And finally, if the DEFAULT value is chosen again :


That's All!!! 
Enjoy Angular.....

      by Carmel Schvartzman

כתב: כרמל שוורצמן

Wednesday, September 11, 2019

How to hide the Scripts folder while debugging an Angular application on Visual Studio 2015/2017

In this article we review how to hide the Scripts folder while debugging an Angular application on Visual Studio 2015/2017,  when by default the folder that contains the Angular javascript  files is displayed automatically :


How to hide the Scripts folder while debugging an Angular application on Visual Studio 2015/2017


Follow this steps :

1) While debugging , close the Script Documents folder on Visual Studio, and click on the project that you are developing:


2) Click on the "Scope to this" function over the current project:


Now, the scripts folder will disappear, and you could keep working on your project without it.

3) To reenable the scripts folder, just click on the "Home" button on the Solution Explorer:


That's All!!! 
Enjoy Angular.....

      by Carmel Schvartzman

כתב: כרמל שוורצמן

Wednesday, August 14, 2019

How to enable intellisense for Bootstrap classes in Visual Studio 2015-2017

In this article we review How to enable intellisense for Bootstrap classes in Visual Studio 2015-2017 . This is when Bootstrap intellisense is not showing up in an HTML page in an Angular project  in Visual Studio:


How to enable intellisense for Bootstrap classes in Visual Studio 2015-2017


1) First, go to the Solution Explorer, and inside the SRC  folder, click on the "Show all files" button. Then open the "node_modules" folder:


2) Look for the "Bootstrap" folder, and select the "Include in project" option for this folder:


3) Restart your Visual Studio application, and going to some HTML file, and pressing  CTL+SPACE inside the "class" of some tag , you'll see the Bootstrap intellisense working:


That's All!!!  Here we've seen how to enable intellisense for Bootstrap classes in Visual Studio 2015-2017.
Enjoy Angular.....

      by Carmel Schvartzman

כתב: כרמל שוורצמן